Using Globus Management Console
The management console provides an interface to monitor and manage activity on managed endpoints and is available to subscribers. This allows activity monitors to identify and troubleshoot faults that may indicate underlying infrastructure issues, and manage resources on their infrastructure
1. Access to console
Users need to be granted Management Console access on an endpoint before they can use the interface. This is accomplished by an Administrator for the endpoint granting the user either the Activity Manager or Activity Monitor role for the endpoint, as appropriate. Instructions on how to manage and assign roles for an endpoint can be found here.
2. Monitoring Tasks
2.1. Activity overview
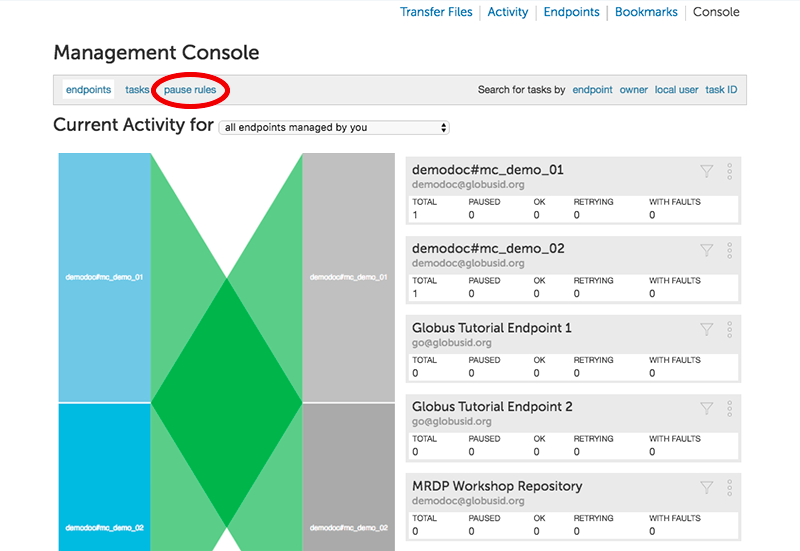
When an activity monitor first logs in to the Management Console they will see the Current Activity view for all endpoints they manage, as shown below:
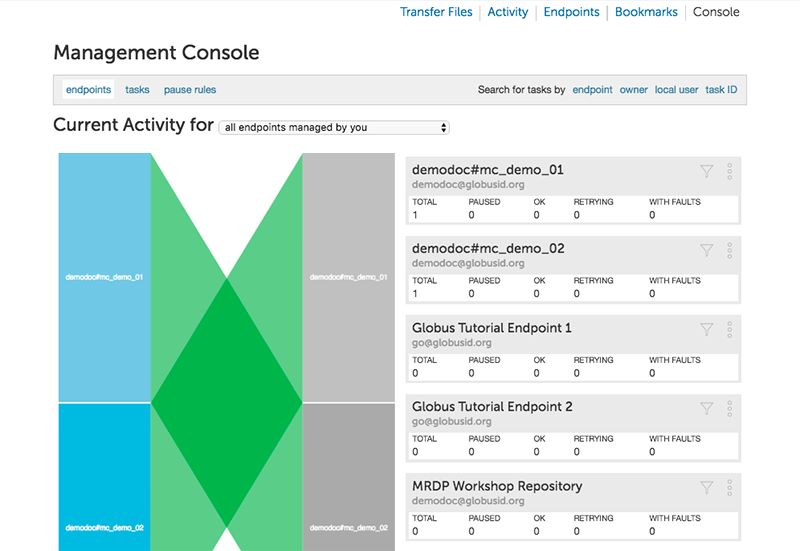
The above shows the console’s endpoint overview. The interactive graphic gives activity monitors an easy way to see the status of transfers to and from their monitored endpoints; green represents transfers that are making progress, orange highlights transfers that are being retried, and red represents paused tasks. Per-endpoint summaries with links to drill down into endpoint details are also provided.
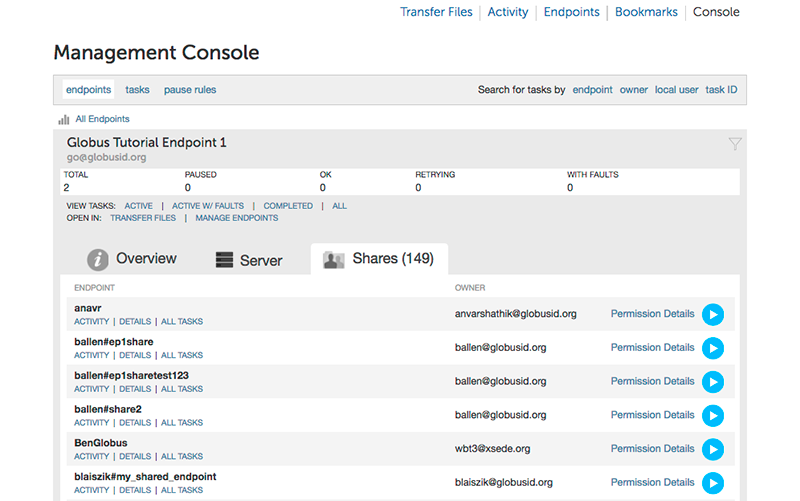
A count of active file transfer tasks for each endpoint is shown, and clicking the vertical ellipsis beside an endpoint listing takes the user to a page with an overview of the endpoint configuration, server information and a list of shared endpoints hosted by the endpoint. The next image shows shared endpoints hosted on the Globus Tutorial Endpoint 1 endpoint, with permission details for each shared endpoint.
2.2. Search and filters
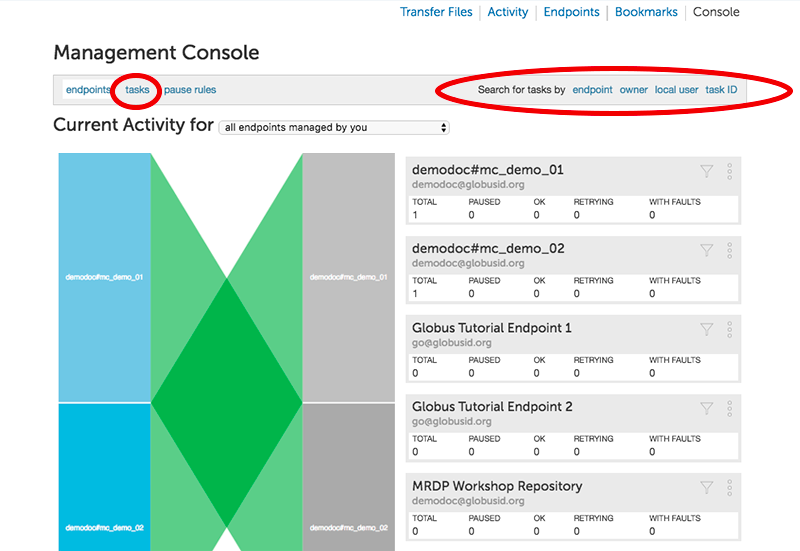
The Management Console supports search and filters to allow the activity monitor to find tasks of interest. To look at all active transfer tasks, click on the "tasks" link. To look at a list of tasks filtered by endpoint, transfer owner, local user or transfer task ID, the user can use the search links. Alternatively activity monitors can click on an endpoint name, username or task id to filter on that.
For example, if an activity monitor wanted to find all tasks involving their endpoints for Globus ID user "demodoc@globusid.org" they would click "owner" and enter "demodoc@globusid.org" as the Globus Identity in the search filter box and press enter - like so:

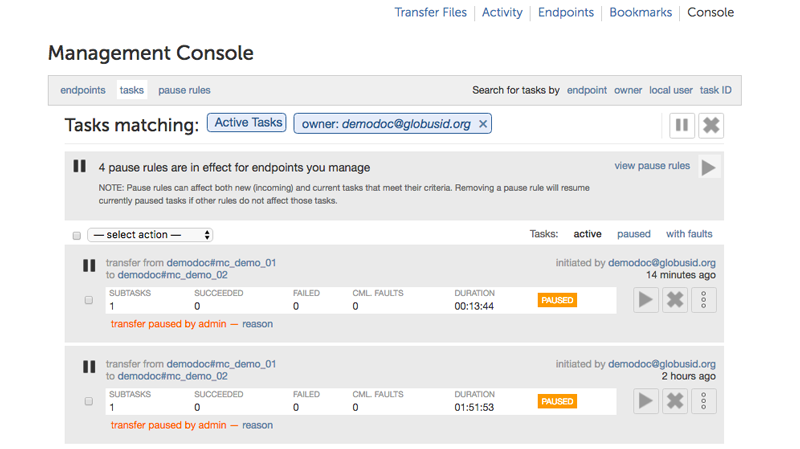
Once the admin has selected the tasks that they wish to examine they can then see detailed logs of the transfer, as well as choose to pause/resume or cancel the task.
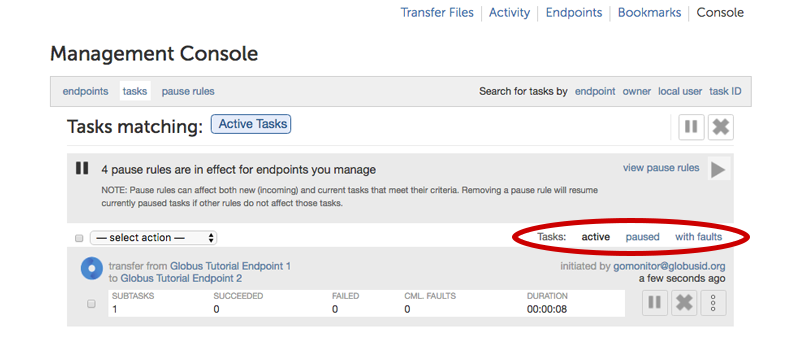
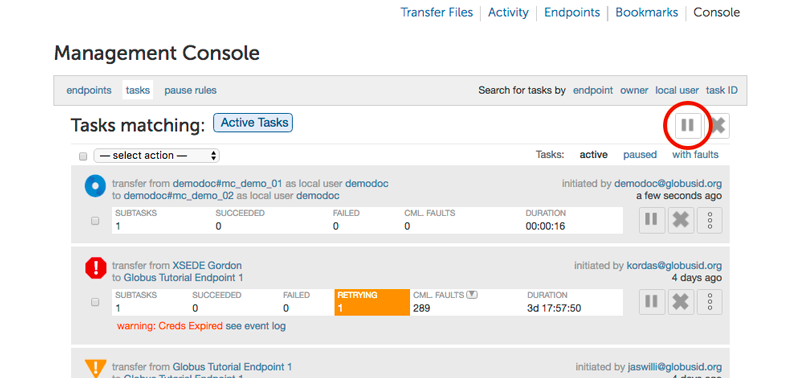
The interface also has some pre-defined filters for common search parameters, such as tasks with faults, paused tasks, as shown in the screenshot below. These can be used to narrow down the search results.
3. Managing Tasks
The Management Console supports activity managers canceling or pausing user’s tasks.
3.1. Pause Tasks
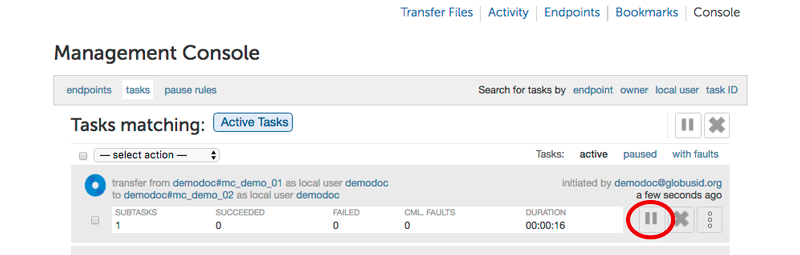
To pause a single task, click the pause button for that task.
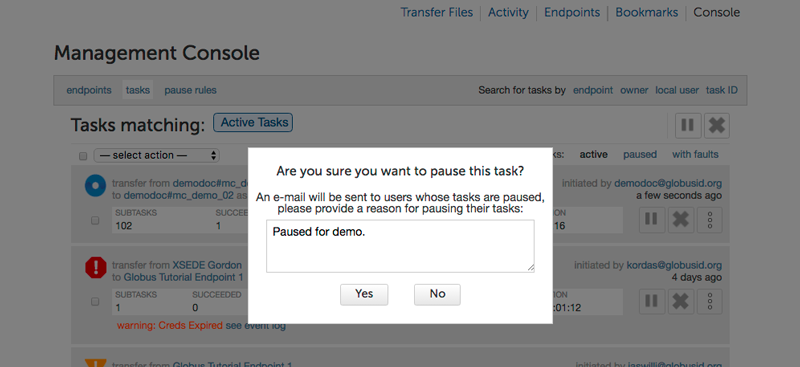
The activity manager will be prompted to provide a reason that will be included in the email notification sent to the user who initiated the task.
Once paused, the task can be resumed only by an activity manager of the endpoint. It might take up to a couple of minutes for the task to pause and transfers to the server to stop, and for the status of the transfer to be reflected as paused on the Globus Web App.
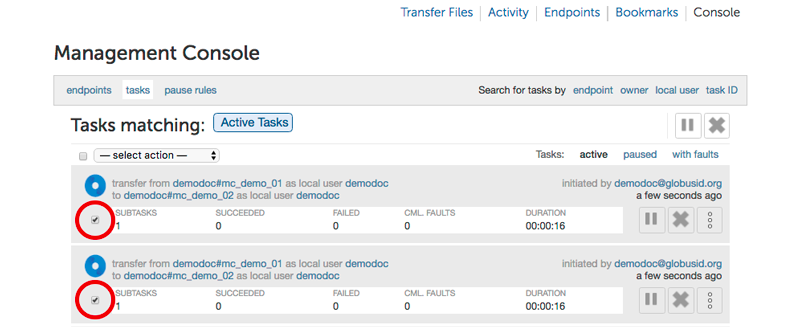
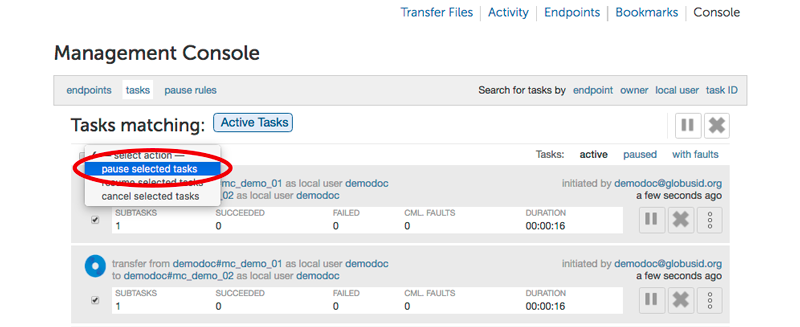
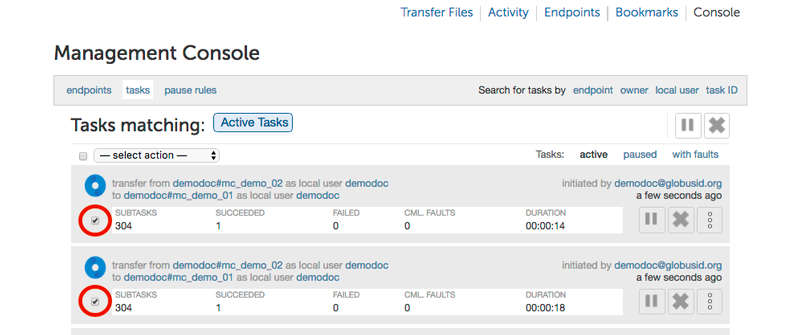
To pause multiple tasks, the activity manager can select the tasks they would like to pause using the checkbox next to the task.
Once all of the desired tasks have been selected, choose "pause selected tasks" from the "- select action -" drop down menu.
3.2. Resume Tasks
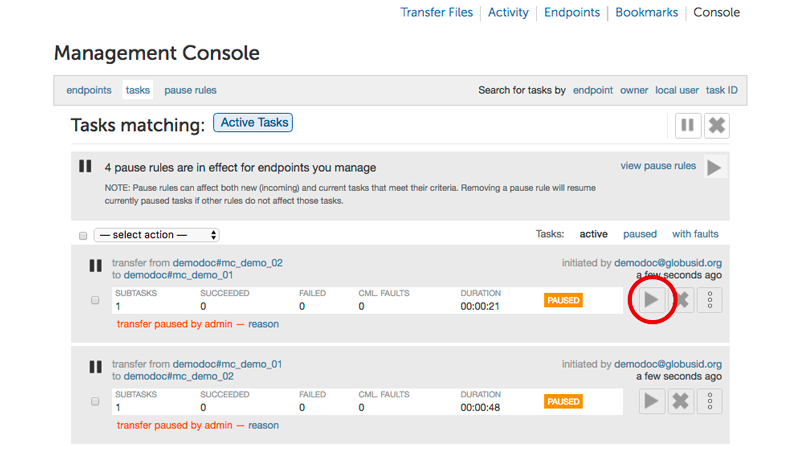
To resume a single task, click the resume button for that task.
Once resumed, the user is sent an email that the task has been resumed by an activity manager of the endpoint. Activity managers can use the "paused tasks" filter to identify the set of tasks that can be resumed.
Note that if the task has also been paused by the activity manager of the other endpoint, it will not be resumed until both source and destination activity managers have resumed the task.
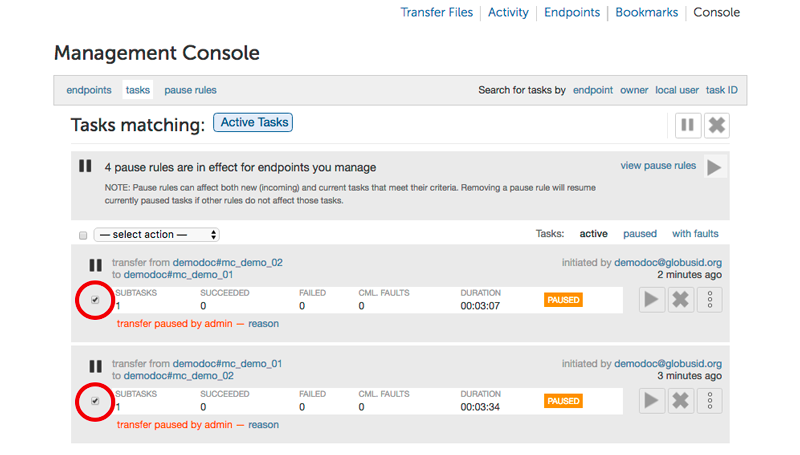
To resume multiple tasks, the admin should click the checkbox for the task for each task they wish to resume.
Once all of the desired tasks have been selected, pick "resume selected tasks" from the "- select action -" drop down menu.
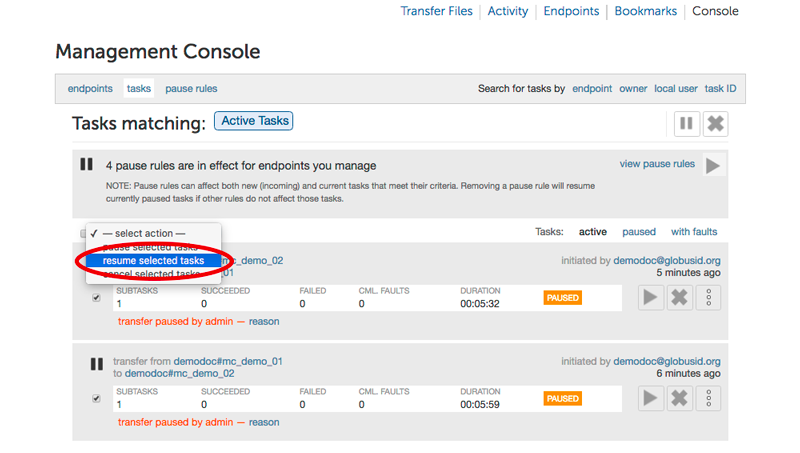
As before, the users are sent an email that their task(s) have been resumed by an activity manager of the endpoint.
3.3. Pause Rules
In addition to pausing specific tasks, the console allows the activity manager to setup pause rules that can be used to affect both current and new tasks according to a set of filters the activity manager specifies. Pause rules can be useful for situations in which the admin wants to pause tasks with much finer granularity than is possible with a normal task filter, or when an admin wants to pause both current and future tasks on their endpoint(s).
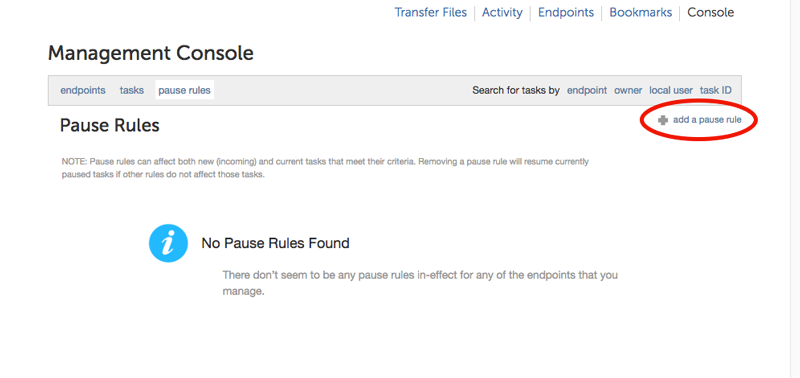
To create a new pause rule or view current pause rules, click on the 'pause rules' link in the management console.
This will take you to the Pause Rules page, where you can see all currently existing pause rules. To create a new rule, click on the 'add a pause rule' link.
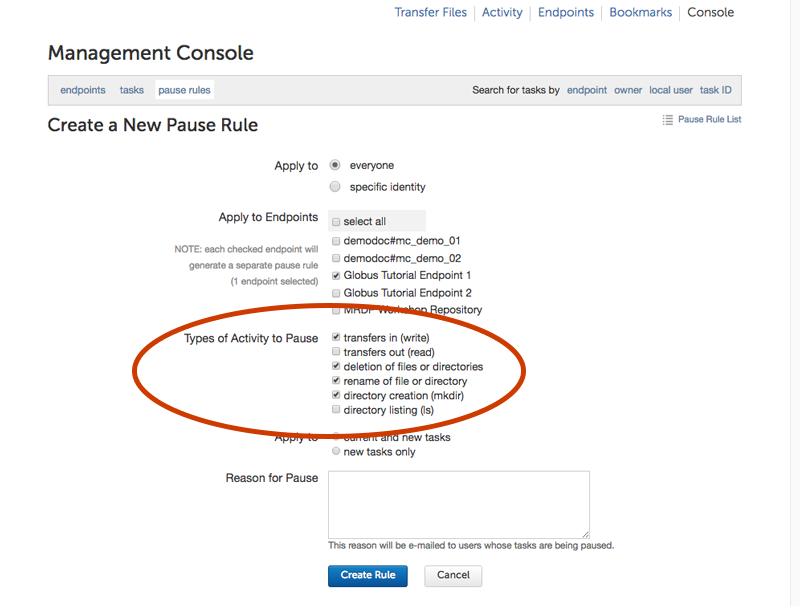
This will then go to a page to create a new pause rule. Select the appropriate options for the rule you wish to create, and then press the Create Rule button.
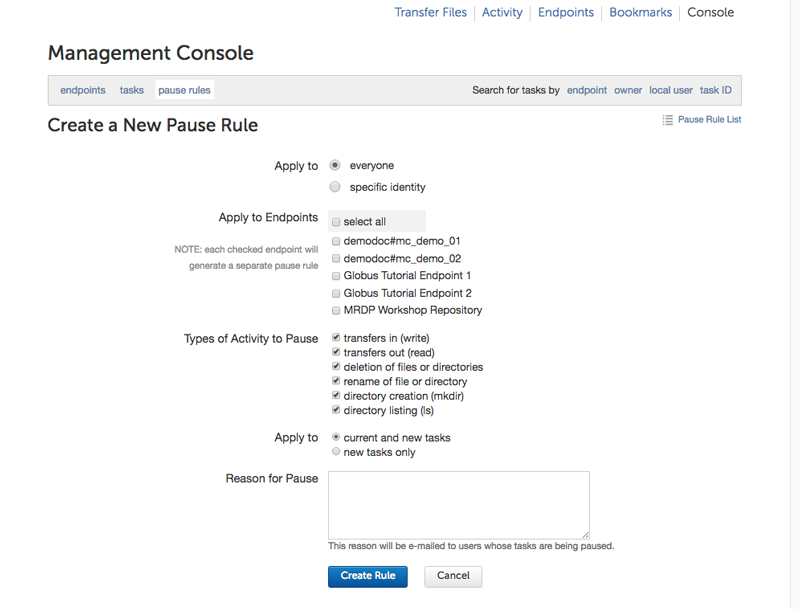
The pause rule will affect all tasks that meet the conditions set on the rule.
By default all of the user’s currently active and queued tasks are paused, and any new tasks that the user submits will also be automatically paused. But the activity manager can choose to pause only new tasks or tasks already submitted.
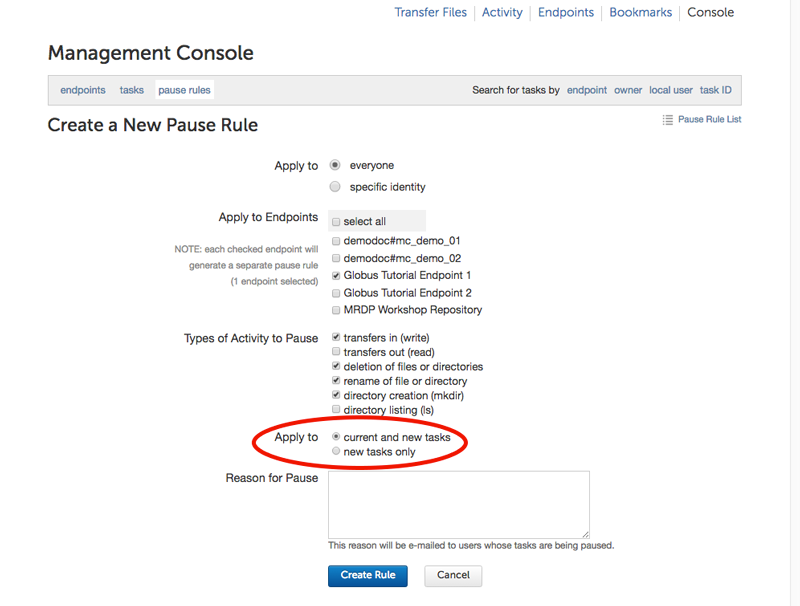
Similarly, by default, all types of tasks are paused: read, write, interactive tasks and submitted tasks. But the activity manager can choose the types of task to pause. For example, in the screenshot below, write activity on the endpoint Globus Tutorial Endpoint 1 is paused, while all read activity is allowed.
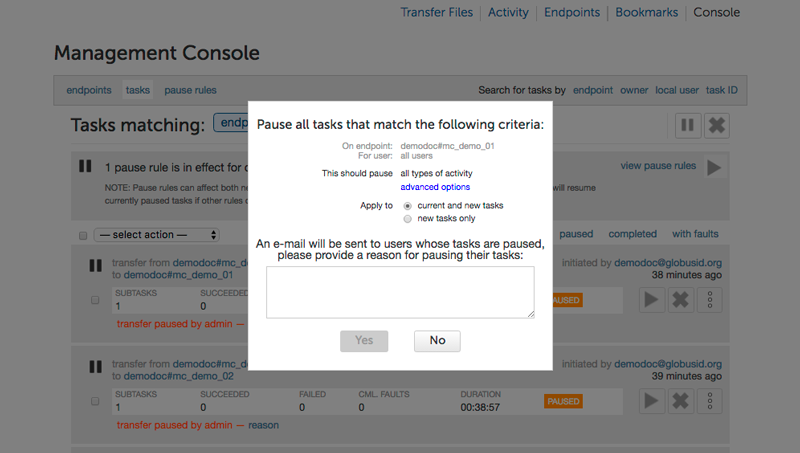
A pause rule can also be created by choosing the pause option near the filters on the tasks view, as shown below:
This will allow the creation of a pause rule with the filters on the tasks tab pre-filled. For example, pause on a screen that has all tasks from demodoc#mc_demo_01, will show a pause rule creation window as follows:
To edit an existing rule, click on the vertical ellipsis next to the rule in the Pause Rules page.
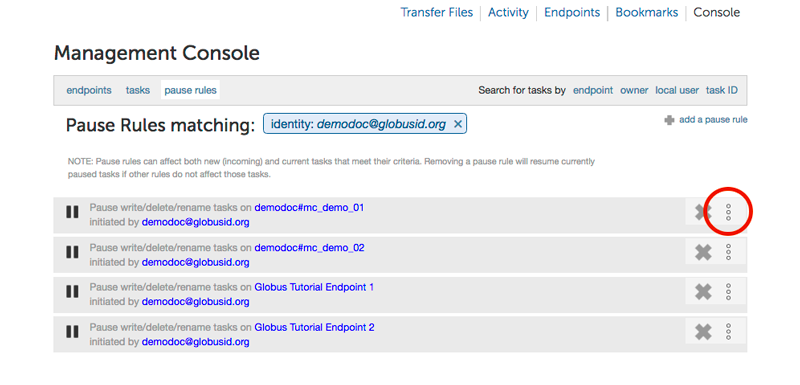
To delete a pause rule, click on the X next to the rule, or click on the Delete Rule button.
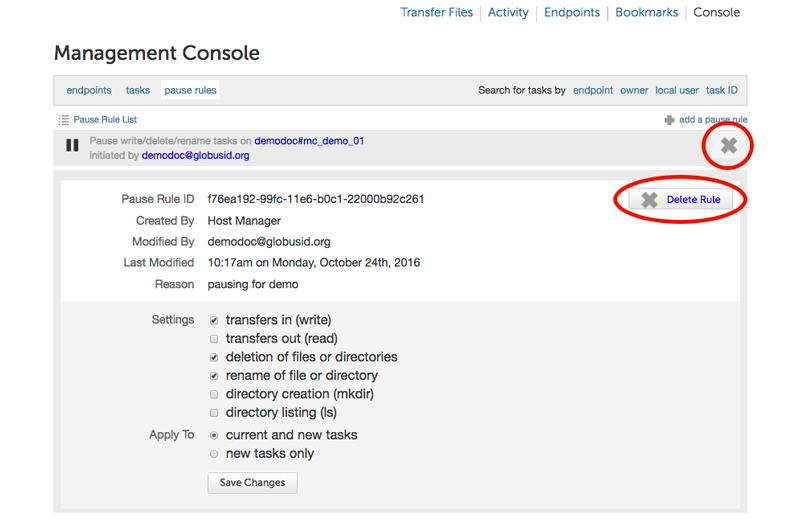
When a pause rule is deleted all tasks that meet the conditions set on the rule will be resumed. If a task has been explicitly paused by directly pausing the task, such a task will not be resumed unless the task is explicitly resumed. If a task is paused by the activity manager of the other endpoint, such tasks also will not be resumed until all both source and activity managers have resumed the task.
3.4. Cancel
Cancelling a task terminates the user’s task and notifies the user that their task has been canceled with the message provided by the activity manager. An activity manager may cancel a single task, or bulk cancel a set of tasks identified using the console’s search capability.
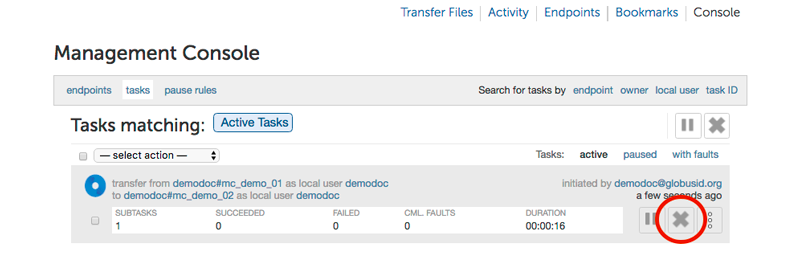
To cancel a single task, simply click the cancel button for that task.
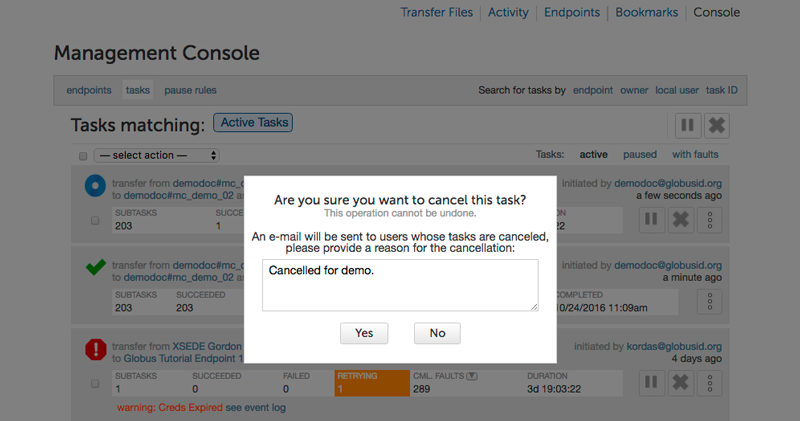
The admin will be prompted to give a reason that the task is being canceled. This reason will be sent to users in an email message explaining why their job has been canceled.
Once canceled, the user is sent an email that the task has been canceled by an activity manager of the endpoint.
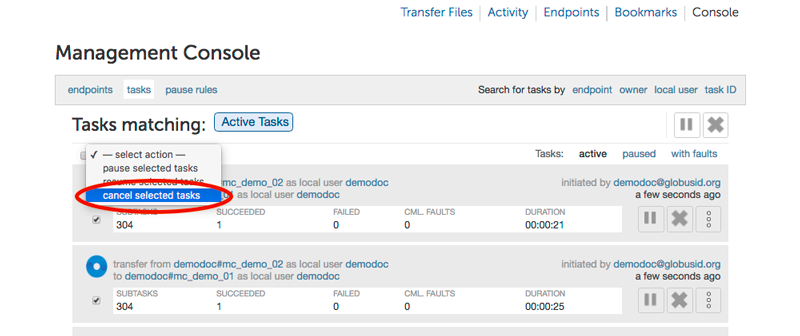
To cancel multiple tasks, the admin should click the checkbox for the task for each task they wish to cancel.
Once all of the desired tasks have been selected, pick "cancel selected tasks" from the "- select action -" drop down menu.
As before, the admin will be prompted to supply a reason that the tasks are being canceled, and this reason will be sent out in a message to those users whose jobs are affected by the cancel operation.
4. Globus Support
Please submit any questions on the management console to support@globus.org.